Checking a Bladder Tank
If you have a bladder tank, you should be aware that ensuring your system is functioning properly is essential to performance. This should be done at least every six months to avoid unexpected damages. For example, if your pump has been rapidly cycling on and off – Say, in around five seconds to half a minute – Then there’s good reason to check your bladder tank before your pump and its motor can be damaged any further. This article will provide you with a step-by-step guide on how to check your bladder tank.
Please note this article does not apply to galvanized tanks; you should only follow these instructions if you have a bladder tank.
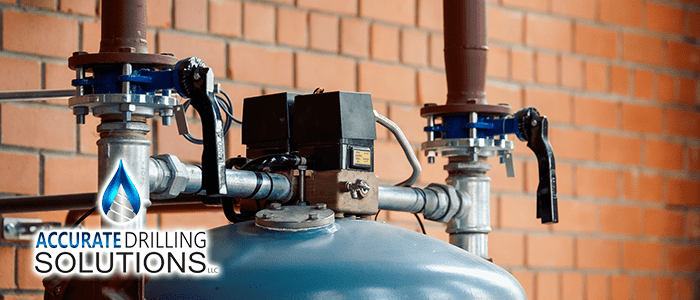
What is a Bladder Tank?
Old pressure tanks had a single compartment and were called air over water pressure tanks. The water directly contacted the walls of the tank. Bladder pressure tanks, by comparison, have a bladder inside made of durable, malleable material that stretches as water is added. Compressed air on top of this bladder squeezes it down, moving the water into the rest of your system.
The Simple Processes
Depending on what kind of well water system you’re operating, the process will be a bit different for home water systems, water to air heat pump systems, and artesian wells or flowing well systems.
Home Water Systems, Artesian Wells, or Flowing Wells
- Check the pressure gauge and note what level of pressure activates the pump.
- Shut off power going to the pump.
- Depressurize the system at the hose bib, making sure all pressure is drained. If you are working with either an artesian well or a flowing well, you will need to turn the valve off at the well before this step.
- Take off the Schrader valve cap and check the pressure with a pressure meter or tire gauge. The pressure should read 2 lbs less than the level at which the pump is activated.
(For example, if your pump turns on at 40 psi, the tank should have a pressure of 38 psi.) - Add or remove pressure until it reaches this level. If your tank cannot hold pressure, it may need to be replaced.
- Once the tank is properly pressurized, replace the cap and follow the procedure in reverse.
Water to Air Heat Pump System
For these systems, the steps are nearly identical to the above. However, the method of releasing pressure differs significantly. Therefore, step 4 will be different for checking this bladder tank.
- As above, check the pressure gauge and note when the pump activates.
- As above, remove power from the pump.
- Run your air conditioning or heat until all pressure has been drained from the system.
- As above, remove the Schrader valve cap and check the pressure. Please set it to two pounds less than the activation pressure for the pump.
- As above, add or remove pressure using an air pump or air compressor until the pressure is where it needs to be. Then once again, follow the procedure in reverse to power on and pressurize the system.
Please note that your pump isn’t supposed to lose its prime during this procedure. You’ll have to prime your pump as normal if this occurs. Accurate Drilling Solutions is here for you if you have any questions about this process or would rather leave it to the professionals.
continue reading
Related Posts
Addressing Water Pressure Issues in Wells: Expert Solutions Water pressure

Benefits of Water Filtration Systems for Well Owners in Central
Essential Tips for Conserving Water with Your Private Well Are